Toolbox & Tricks
Useful links
- Ayaneo discord (please stay civilized even if your preorder is late)
- Ayaneo subreddit
- Ayaneo download page
- The Ayaneo support can be mailed at service@ayaneo.com
Useful tools
- Handheld companion (tdp control, gyro, Xbox & Playstation controller emulation, and way more)
- Controller companion (joystick mouse)
- AMD Adrenalin (amd drivers)
- FXSound : Increases speaker volume and adds a little bit of clarity
- RTSS (display stats as an overlay)
- With HardwareInfo to show more stats than just FPS
- Dimmer : darken your screen a bit more for night time sessions
- Syncthing : (a pandora box) if you want to synchronize / backup data across different systems
- CrystalDiskInfo : see which SSD you have and its temps
Ayaneo 2 Retro Power Background:
Setting the power button to hibernate :
Why : that way, your power button will work **almost** like the one on other handhelds. The state is saved to the drive, so your Ayaneo is really turned off - not sleeping and using battery as is done by default. You can also hibernate while playing, your game will be where you left it on booting back up.
As said better by Microsoft themselves
- Start , then select Settings > System > Power & sleep > Additional power settings.
- Select Choose what the power button does, and then select Change settings that are currently unavailable. Under Shutdown settings, select the Hibernate checkbox (if it’s available), and then select Save changes.
Lowering the refresh rate :
Why : might save you a bit of battery and allow you to get higher settings (or lower temps), as the frame rate of the games will be lowered to match. So far the community has managed to make 46hz, 48hz, and 50hz work. Below 46hz does not seem possible after testing by YouTuber Phawx and Ayaneo Discord user DesignGears.
To do so you need to install CRU to manually create a resolution with the lowered refresh rate.
- click Edit when selecting the 1200p/60hz setting. Please note if you need to go back to the stock values, here’s a screenshot of them:
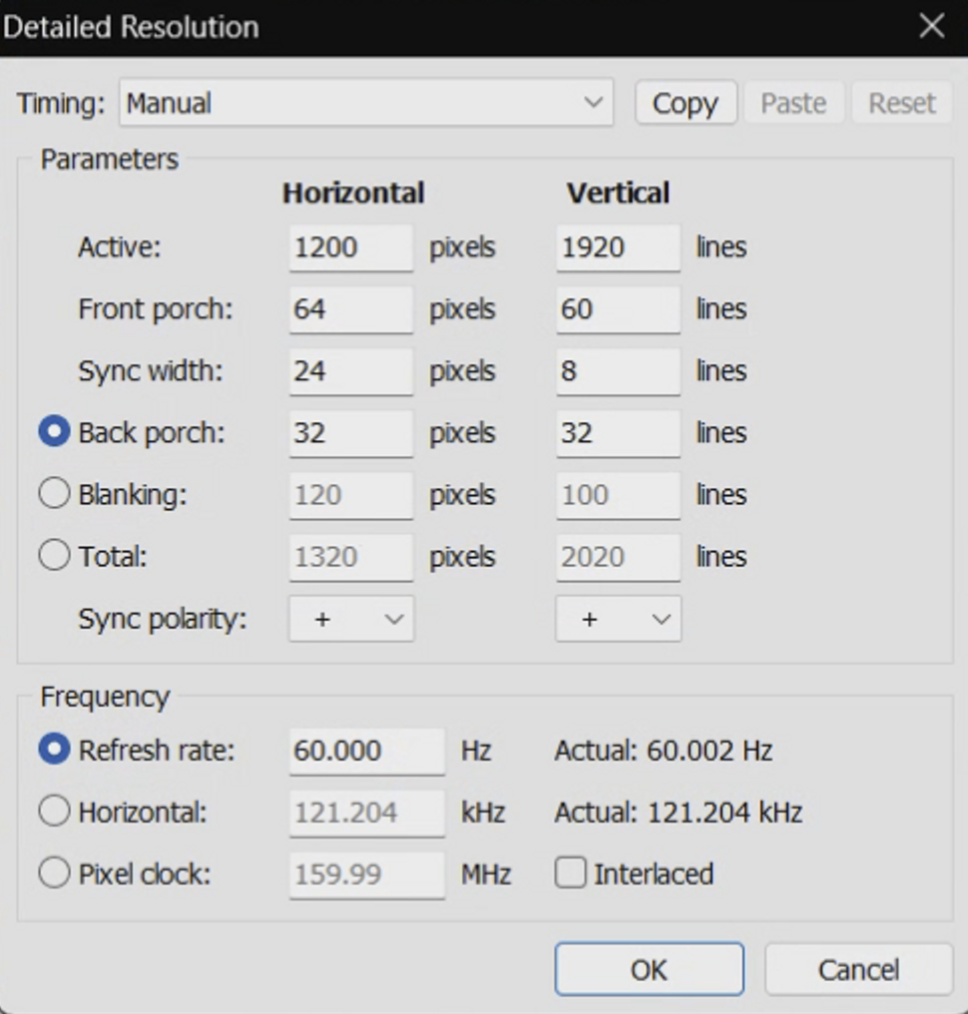
- Click the “Copy” button at the top, then hit “Cancel” to close the window.
- Back on the main CRU screen, click the “Add” button, then click “Paste” at the top to add values from the previous resolution
- Now edit the Refresh Rate value at the bottom to match this screen

- Click OK twice to save and close the app
- Reboot your Ayaneo 2
- You can now select the new refresh rate from your Windows resolution settings. To do this right click on your bare desktop and select “Display settings”. On the window that opens, select “Advanced display”, then change the refresh rate drop down box to “46 Hz”. Your screen will flash to set the new refresh rate. Hit “Keep changes” - then you’re all set.
- If you notice any issues displaying the new refresh rate, go back into Display Settings and change your refresh rate back to 60 Hz. Not all screens will work with 46 Hz. You may need to try 48 Hz or 50 Hz in CRU following the same steps as above.
*Note : in Playnite, you can use the Resolution Changer extension to bind different refresh rates to different games *(via @voitta) **
Proportional Trigger Adjustment:
Why : Some games don’t seem to be able to detect the Hall Effect triggers correctly. One example of this issue is in racing games the acceleration and braking functions are on/off rather than gradual as you pull the triggers.
Steam has controller curve adjustments, which will only effect games launched from within Steam. Adding a non-Steam game to Steam should also work. To set the controller curve:
- Click the Steam menu > Settings > Controller > General Controller Settings > Make sure “Xbox Controller” is selected, then hit “Back”.
- Click on “Desktop Configuration”, then select the left “Trigger” button. Under “Trigger Response Curve” change to “Aggressive”. Then slide the “Trigger Range Start” all the way to the left. Hit “Back”, then “Done” to save changes and exit.
- Games should now have better trigger response. Racing games should now have gradual braking and acceleration as you pull the trigger.
Enabling the touch keyboard and virtual touchpad buttons
Why : Enabling these two buttons gives you easy access to the touch keyboard as well as virtual touchpad (for simulated mouse support). This makes a number of tasks in Windows easier on a touchscreen device.
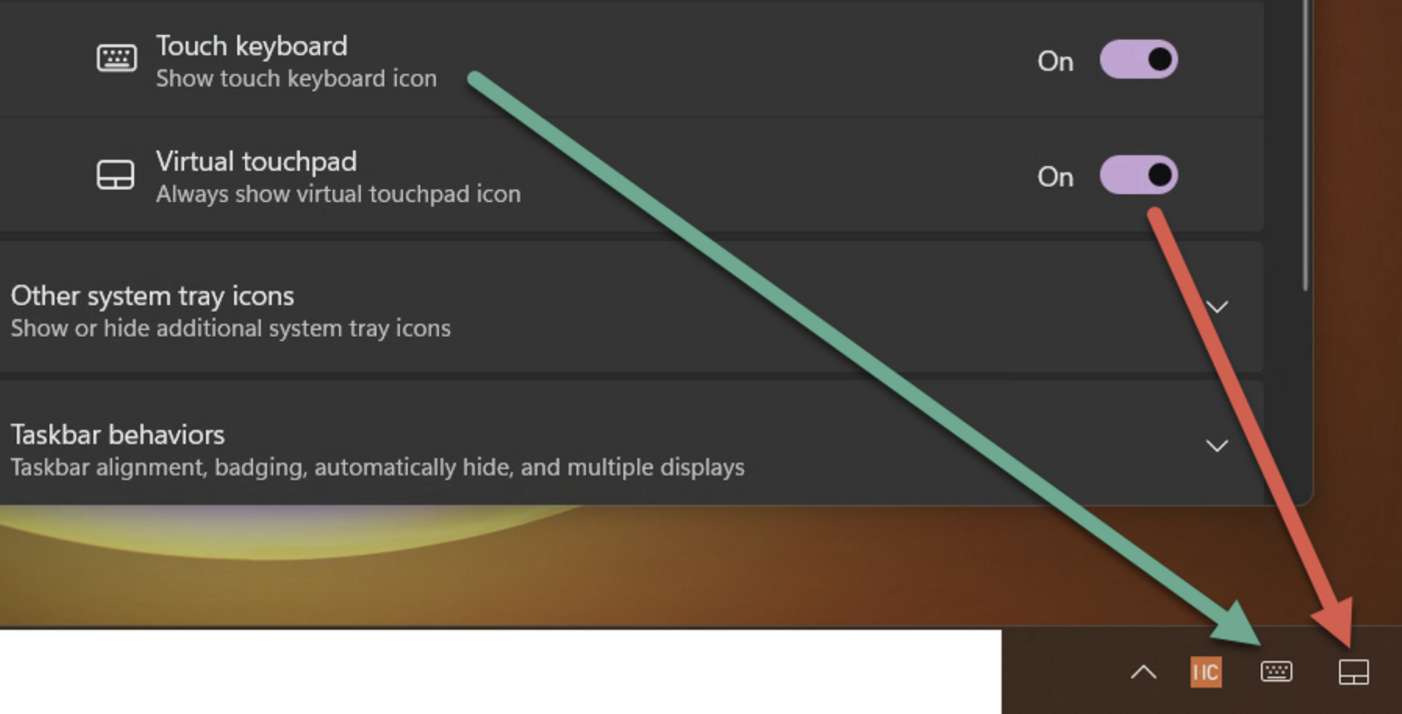
Right click on the Taskbar along the bottom of your screen, then select “Taskbar settings”. Select the sliders next to “Touch keyboard” and “Virtual touchpad”.
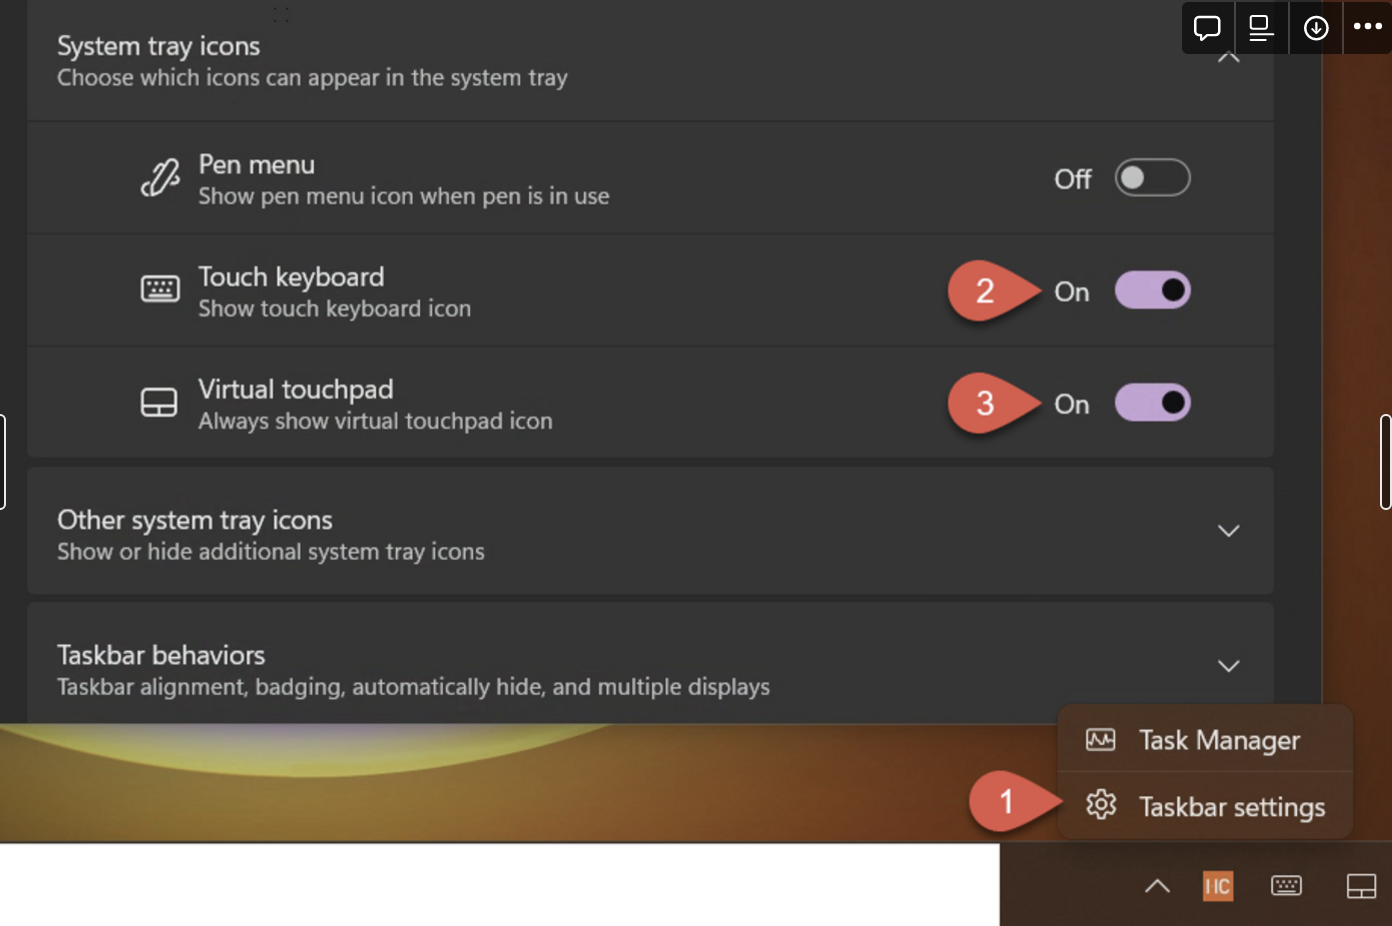
These two icons will not display in the tray on the bottom right corner of your screen.
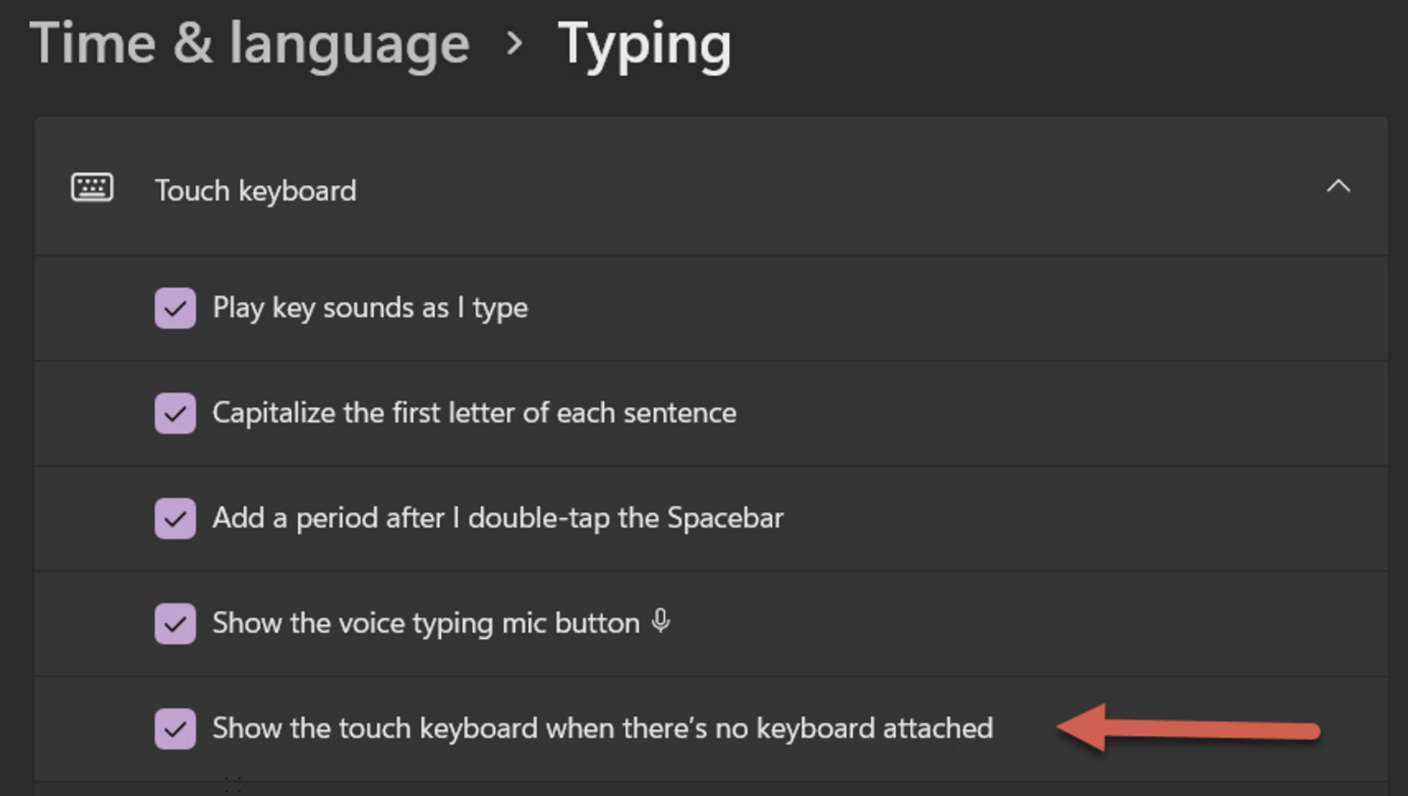
Automatically showing the touch keyboard
Why : When selecting text boxes, the touch keyboard can automatically appear when there isn’t a physical keyboard plugged into your device.
Click on Start, then select or search and select “Settings”. Click on “Time & Language” on the left side, then select “Typing”. Click the drop down arrow next to “Touch keyboard” to see more options. Make sure the checkbox next to “Show the touch keyboard when there’s no keyboard attached” is selected.
Note: some joystick mouse software, such as Controller Companion and JoyXoff, includes virtual keyboards (via hotkeys), and seems to prevent the touch keyboard automatically appearing.
How to fix an unresponsive touchscreen
Why : Some user’s touchscreens stop responding randomly, requiring a reboot to continue working again.
To resolve this, go to Ayaneo’s official downloads page and download the “Ayaneo 2 touchscreen driver”. Installing this driver should resolve the issue.
https://ayaneo.com/support/download